#Viper4Android FX
Explore tagged Tumblr posts
Visit Tumblr Blog
Explore Tumblr blogs with no restrictions, modern design and the best experience.
Last Seen Tumblr Blogs


Fun Fact
Post activity is at the highest at 4:00 pm EDT; notes peak at 10:00 pm EDT.
Text
Aumento De Graves Y Volumen General

Si debe conectar parlantes externos a su computadora portátil para gozar de la música o ver una película, debe procurar instalar un amplificador de sonido para su computadora portátil en Windows 10. Una cosa en la que todos estarán conforme es en el hecho de que las computadoras portátiles son dispositivos sólidos. y también incluyen partes más pequeñas en comparación con un escritorio y, en consecuencia, la salida se puede ver ahora.
No obstante, el mezclador de audio en Windows diez no siempre produce el sonido inmejorable del que es capaz. Intente emplear el reproductor VLC y observará instantáneamente la diferencia. Sin embargo, si quiere acrecentar el sonido general de su Windows 10 mientras que juega y transmite videos en YouTube, puede decantarse por uno de los amplificadores de volumen para computadoras portátiles con Windows 10 que se enumeran a continuación:
Lista de los ocho mejores amplificadores de sonido para computadoras portátiles y de escritorio con Windows diez, ocho, siete Acá está la lista de los 8 mejores amplificadores de volumen de ordenador para aumentar el sonido de los altavoces:
1. Bum 3D Descargar Boom 3D desde el botón de abajo
Con más de 40 millones de usuarios de la aplicación Boom 3D para macOS y también iOS, la empresa matriz Global Delight Apps decidió finalmente lanzar esta aplicación para Windows 10. La razón del éxito de la aplicación Boom 3D es el hecho de que es simple de utilizar y aumenta el volumen en Windows 10. Esta aplicación está diseñada en 3D Surround Audio Engine Algorithm, que es una tecnología patentada y puede calibrar sensaciones acústicas. Otras peculiaridades que hacen de Boom 3D el mejor amplificador de sonido para portátiles en Windows diez incluyen:
- Preestablecidos predeterminados con personalizaciones disponibles. - Un potente ecualizador. - Compatibilidad con auriculares / audífonos con soporte de sonido envolvente. - Efectos singulares y refuerzo de graves: acepta todos los reproductores y servicios de transmisión de terceros.
dos. FxSound FX Sound es una aplicación increíble para prosperar el sonido en Windows 10 y acepta una salida de baja resolución. Este ecualizador es compatible con todos y cada uno de los métodos de salida, por lo que incluso puede conectar una máquina de discos a su computador y gozar del sonido ajustado. Tiene una interfaz fácil de utilizar y es plenamente compatible con Windows 10. Otras características incluyen:
- Efectos personalizados. - Potente ecualizador. - Preestablecidos basados en géneros. - Incremento de graves y volumen general. Haga click acá para descargar de los mejores impulsores de volumen para computadoras portátiles con Windows diez.
3. Ecualizador APO Si se ha estado preguntando cómo aumentar el volumen de su computadora portátil de manera gratuita, Laptop Equalizer APO es la aplicación para . Es una aplicación de código abierto y liviana y no consume muchos de los recursos de su CPU. Otras peculiaridades de este amplificador de sonido para computadora portátil en Windows 10 incluyen:
Soporte para un número ilimitado de canales. Complementos VST compatibles
Un número infinito de filtros. Sin inconvenientes de latencia
Interfaz compatible con Voicemeeter y Peace. Otra característica que vale la pena mencionar es la interfaz gráfica de usuario, que más bien no está desarrollada para simplificar, y las opciones se ponen como una aplicación sin formato. Sin embargo, para superar este problema, puede instalar Peace Interface, que redefine la interfaz y le da control para progresar el sonido en Windows 10.
cuatro. Potenciador de audio de Fidelizer El amplificador de volumen de Fidelizer para portátiles con Windows diez es una aplicación que optimiza su sistema para mejorar el sonido a un nivel perfecto. Es compatible con la mayor parte del software como YouTube, VLC, Spotify, etc. y admite servicios de transmisión como Qobuz y Tidal. La optimización efectuada solo durará hasta una sesión activa de su computadora. Una vez reiniciada la computadora, deberá regresar a ejecutar la aplicación y optimizarla nuevamente. Otras peculiaridades incluyen:
- Una guía de instalación detallada que explica todo el proceso desde la instalación hasta la personalización está disponible en el sitio web. - No obstruye otros procesos relacionados con el audio. - Aparta los procesos que no son de audio y reduce su prioridad y, por ende, desvía todos y cada uno de los recursos probables de la CPU para acrecentar las ventanas de volumen. - La versión completa deja al usuario seleccionar entre siete perfiles de audio.
Fidelizer está libre en 3 versiones: Fidelizer Plus, Fidelizer Pro y la versión gratis con opciones limitadas.
cinco. Trompeta de oído Ear Trumpet no es precisamente una aplicación separada para aumentar el sonido en Windows diez, sino más bien un complemento del mezclador de audio predeterminado de Windows 10. Permite al usuario controlar el volumen individual de todas y cada una de las aplicaciones abiertas en su sistema. La configuración es bastante simple y con un solo click le permite elegir entre los dispositivos de reproducción. Ear Trumpet está disponible de forma gratuita en Microsoft Store. Otras peculiaridades de este eficaz amplificador de volumen para portátiles con Windows 10 incluyen:
- Mezclador de volumen independiente: establece el sonido predeterminado para todas y cada una de las aplicaciones. - Soporte multilingüe - Modo oscuro. - Actualizaciones automáticas por medio de la aplicación Store. - Se pueden configurar teclas de acceso rápido.
Lea también: diez mejores altífonos de escritorio para su computadora 6. Reunión de voz
Un amplificador de sonido gratis para una computadora portátil con Windows diez, Voice Meeter, puede ajustar todas las transmisiones de audio que se reproducen en su computadora de forma individual. En contraste a Ear Trumpet, que permite a los usuarios solo aumentar o reducir los niveles de volumen de una aplicación individual, Voice Meeter asigna un ecualizador individual a cada aplicación. Asimismo permite a los usuarios grabar el audio del escritorio y dejar de lado cualquier otro sonido y voz. Voice Meeter ofrece posibilidades ilimitadas, mas para comprender y usar esta aplicación de la mejor forma posible, uno debe leer el tutorial o ver YouTube explicando las peculiaridades de esta aplicación. Sin embargo, por el momento, simplemente puede descargarlo gratis y emplearlo para aumentar el volumen en Windows diez.
siete. Viper4Windows Otra resolución sobre de qué forma acrecentar el volumen en su computadora portátil es descargar y también instalar Viper4Windows. Esta aplicación es un proyecto impulsado por la comunidad y ha lanzado dos versiones del software, una para Windows y la otra para Android. Si ha instalado ROMS personalizadas del sistema operativo Android en su móvil, observará que muchas de estas ROM tienen Viper4Android como software de audio predeterminado. Algunas de las peculiaridades que hacen de Viper4Windows uno de los mejores impulsores de volumen para portátiles con Windows 10 incluyen:
- 3 modos: modo de música, modo de película y estilo libre. - Refuerzo de graves natural. - Claridad y purificación de sonido. - Múltiples modos de sonido envolvente - Compresor de sonido - Avisa si ha estado escuchando demasiado tiempo. - Ecualizador - Eco
ocho. Retocador de audio Si busca un amplificador de sonido simple para una computadora portátil con Windows 10, entonces Audio Retoucher es probablemente la aplicación que busca. Se desarrolló teniendo en cuenta a los usuarios que no son expertos en tecnología y solo les preocupa aumentar el volumen en Windows diez. Las características más esenciales incluyen:
- Configuraciones simples. - Calibrar parámetros de sonido. - Establece la intensidad del tono, el tempo y el nivel de graves. - Amplifica el sonido existente en Alta Frecuencia. - Mide BPM con precisión. - Estiramiento del tiempo
Haga clic acá para descargar. Su elección sobre los mejores amplificadores de sonido para computadoras portátiles y de escritorio con Windows diez.
Depende totalmente de elegir la mejor aplicación para acrecentar el sonido de su Windows 10. No obstante, al acrecentar el volumen del audio, puede acrecentar los graves y agudos solo, como introducir efectos como eco, configurar modos conforme con géneros y considerablemente más. Para resumir, puede crear una experiencia increíble con una simple pieza musical. Este software normalmente no consume gran parte de los recursos de la CPU, mas permite que los parlantes incorporados de su computadora portátil produzcan salida a su máxima capacidad, algo para lo que fueron diseñados en primer lugar.
1 note
·
View note
Text
10 essential Magisk Modules for Android Devices
10 essential Magisk Modules for Android Devices
Among the lots of different methods of rooting android devices Magisk is a better method that we can identify. It can be categorized as a systemless method, so it doesn’t change the device system partition. The advantage of this systemless method is we can unroot the device in a point-even.
We can enhance and add some functionality to our device with the support of magisk modules which are tiny…
View On WordPress
#Android#App Systemizer#ARcore#ARCore/ Playground Patcher#Bixby Button Remapper#Call Recorder#CloudflareDNS4Magisk#install Magisk Modules#ios12.1 Emoji#magisk#Pix3life#Uninstall Magisk Modules#Viper4Android FX#Xposed Framework
0 notes
Text
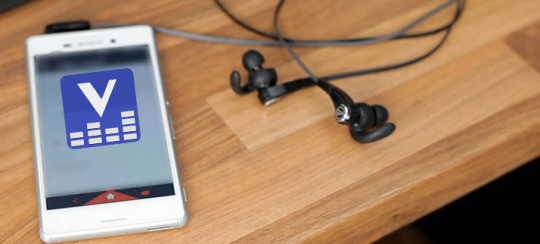
Download Viper4Android
Download Viper4Android FX Apk and Install
Hello, Friends, Today I am Really glad to be here for imparting My insight to you. Presently, I am will examine How To Download Viper4Android FX and Install on Android. This is the best Tool for balancing Sounds in our Entire Android Device. Not just this you can observe more Facilities with this App when you have downloaded and Installed.

Viper4Android FX is an Excellent Sound Operating App on Android Device. You can get Cinematic Sound framework with Headset. We can without much of a stretch change Audio Frequencies, in our coveted Range on Rooted Android Mobile. On the off chance that you need to utilize your Android in Desired Sound Levels then this is simply the Perfect Article to control. In any case, It is popular in light of the fact that this App has Pretty Sound Settings.
You can oversee Entire Android Device sound frameworks through this App. What's more, No other application will work like this Features. Thus, introduce this Immediately and begin Enjoying with great capable of being heard sound Levels through your Device. Above all else, You have to check a portion of the accompanying Features, App Info, Compatibility at that point Go for Download and Install Steps.
Application Info:
Name of the App Viper4Android FX.
Class – Sound Settings Manager for showing signs of improvement impacts.
Old form XHiFi, New Version FX.
The keep going refresh has discharged on 1 September 2016.
By and by running form is v2.5.0.5.

Similarity:
Look at your Compatibility before going to get download and introduce this. Along these lines, Find your Device form is Available in it or not. In the event that it alright, at that point go additionally steps:
Android 2.3, Android 4.0-4.1-4.2-4.3-4.4, Android 5.0, Android 6.0, Android 7.0.
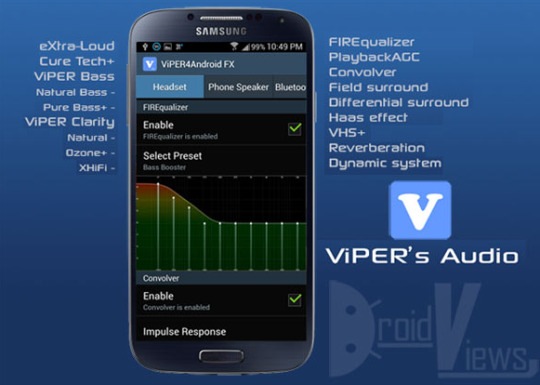
Intriguing Features:
Presently, Everybody appreciates with HiFi sound System on Headset.
You can Make music records with the lossless great yield.
Its base is extremely decent I think you never experienced.
Folks, Viper20 is changed to Viper FX yet no difference in the Name. In this way, You can appreciate with all the old Features obviously.
Great User interface, so you can without much of a stretch oversee settings.
This will bolster Internet Facility.
You can ready to associate with another Device by means of Bluetooth.

Pre-Requisite:
Folks, If you like Features and Readied to download this App, in this way, look at Following Tools you have or not else, It ends up hard to get this App.
Established Android of Any adaptation.
SuperUser App and Busy box App.
Custom Recovery Tools.
Web association.
Viper4Android Fx Apk. (V4A)
Download Viper4Android FX:
This is additionally informal App, So, It isn't accessible on Official Stores like Play Store or Amazon. In any case, We are continually making so less demanding to you by giving download joins. So also for this App likewise you can download from the beneath given connection. Here, we are Providing just most recent Version of Viper4Android FX. In any case, If you get a kick out of the chance to download old adaptations, you can get them from Google directily. What's more, One thing you have to recall is You should utilize Custom Recovery to introduce Viper4Android FX. Else, It to some degree hard to Install.
The majority of the Users supposing Why Installation Failed?
This is going on, Most regularly on the grounds that It was Due to Improper Rooting or Not Installing SuperUser Tool.
How to Install Viper4Android FX Apk:
To get Viper4Android Fx, You have to Install Busy Box. So First We will talk about how to Install Busy Box on Android Then We should go for How To Install Viper4Android FX Apk:
1) Install Busy Box:
In this way, Download Busy box, utilizing this connection.
Introduce Busy box while downloading wrapped up.
Dispatch occupied Box App, It open with an Install catch Tap on that To Root Your Android Device.
In this way, Tap on Install Button, and Ensure to Root When It Raises a Notification.
When It has Installed Perfectly, You can close this Application.
Before the End of Busy Box App establishment, Your gadget is Perfectly Rooted.

In this way, Now you can Ready to Install Viper4Android FX to Set your Desired Frequency of the Sound Modulations. To see that take after the beneath focuses:
2) Install Viper4Android FX:
Companions, When you have every one of the Files Required to Viper4Android FX through the Busy Box, we believe it's Time to Install this Apk on your Smartphone. In this way, take after the beneath portrayed
the methodology deliberately:
Keeping in mind the end goal to Install Apk File, Download It from the Above Prescribed Link under Download Viper4Android FX.
Presently, Start the Installation procedure by Tapping on it.
After that Launch the Application on Android, a notice will Raise with "Refresh Driver Options, Accept it and be tolerant till it has finished.
Here, Once Again You got a notice to Root your Android, Just Accept it and Wait till it has stacked with All drivers. When it has Done A message will show that All drivers are Installed Successfully.
Keep in mind to Rename the Existing records as appeared on Image unmistakably.

How to Fix Bugs on Viper4Android FX Apk:
As a matter of first importance, check your Android Device is Rooted Properly or Not. Something else, Once Again Root as we recommended in ABove Installing Steps. Counting Root, you ought to introduce SuperSU or SuperUser which is settling the Minor Bugs. Look at you are directly utilizing the Valid Viper4Android Apk or Not. This Apk must be Compatible with your Android Version. Indeed, even you tailed me precisely, as yet getting this Bugs at that point Follow underneath Prescribed Points:
Just Uninstall Viper4Android App on your Android including its Drivers.
Presently, Install SuperUser App with V4A when Rooted Perfectly.
After this, Open Sound Settings and go to Music Effects at last select V4A and Test it.
In the event that it was not working at that point go to Sound Settings and Turn on Force Enable.
All things considered, not Working at that point Go for Bug Reporting to the Support.
In this way, Guys, Till now, You have figured out How To Install V4A and Fix the Bugs while utilizing this App. In this way, It's Your Turn. How about we begin Enjoying…
#Download Viper4Android#Viper4Android FX Apk#Install Viper4Android FX#Viper4Android FX#download viper4android ios#viper4android pc#viper4android for android
0 notes
Text
Magisk Modules That You Must-Have on Your Android Device
Magisk is an open-source road utility system that provides security updates on your phone. It is a great option to help you customize your ROMs and OS updates, remove Bloatware, and take over the complete control on your mobile device.
You can begin by rooting with Magisk. It works best with devices that run on Android 5.0 and above. You will require a custom recovery and the Magisk Manager app from XDA developers to begin rooting. Install the Magisk Manager App on your device and open the navigation drawer on the screen. Click on ‘Install’ and press the ‘Download’ button. Reboot your phones to flash your device through TWRP. You can easily install the Magisk module in either of the two ways:
Method One
So this method you will require Magisk-Modules-Repo or Magisk by XDA developers.
Begin by downloading the module on your phone storage.
On the Magisk Manager app, select Modules from the sidebar.
Tap on the Plus icon and find your downloaded module.
To open your desired module, give a long press on it, and the installation process will begin.
Reboot your phone when the app instructs you to do so.
Method Two
Go to ‘Downloads’ of the Magisk Manager app.
A list of available Magisk modules will be shown on screen. You can download by tapping on either of them to read more information about them, including the instructions on how to install and use it.
Click on the download icon to install a module. If you click on the ‘Install’ button, it will download and install everything in one step, but clicking on the ‘Download’ button will save the module directly on your phone storage.
Click on the ‘Install’ button and click on ‘Reboot,’ when prompted, to place the module properly on your device.
If you can’t see anything on the Download list, you can go to your Settings and select Clear Repo Cache and retry the whole process.
In case you are dealing with problematic modules, you can uninstall them at any point by simply going to the Modules in the Magisk Manager app. Remove that checkmarks from the box given on the side of a module to disable it and hit the reboot button. Click on the Trash Can icon and press on the reboot button again, to remove the module entirely from your device.
Following are some of the Magisk module that you must have on your device for better performance:
Xposed Framework
Applying add-ons or mods to the ROMs has become much easier with this module. It adds individual features to the ROMs you use on your device. Because it’s systemless and open-source, it is most likely not to block the Android’s Operating System updates.
App Systemizer
It allows you to convert different apps into system apps so that they don’t get uninstalled by adding an extra protective layer to secure those apps. App systemizer won’t modify your device’s system partition, and it automatically updates itself through the Play Store. Moreover, you can retain the apps you converted from App Systemizer, even after uninstalling the Magisk app.
ART optimization
This virtual machine was introduced by Android lollipop, and it brought the compilation of ahead-of-time (AOT) to the Android code. It configures the art optimization activation on the device, and you can change it on-the-fly based on the profile you have chosen.
Dolby Atmos
As the name suggests, this module will provide effective sound improvements on the device and various other options to enhance the audio quality of your mobile.
Viper4Android FX
It is the most advanced music modification module available on Magisk. It provides extended audio functions for your device that can be customized and modified by you for any part of your Android device’s audio system. You will achieve full control over the audio outputs, volume levels, clarification, and more.
Call Recorder
Some Android devices don’t support call recording features. If you are someone who requires this feature for their everyday business calls, you can use this module. Your only task will be to install this module, the call recorder will handle the rest of the tasks after you activate it. You can also include or exclude specific numbers for recording.
Cloudflare DNS4 Magisk
It has cutting edge technology that is safe to use, and it will provide you with the best privacy benefits to control all your internet surfing traffic. It neither tracks nor stores your data. It provides you with a DNS privacy protection mechanism and combats snooping. It encrypts all the communications between the stub resolver and the recursive resolver.
YouTube Vanced
This is great for your YouTube app to help you support background play, pinch-to-zoom gesture, play videos on loop, blocks ad, and many more. On Oreo devices that also support Picture in Picture (PiP) mode. You can use the override maximum resolution feature as well.
iOS 12.1 Emoji
It is the best option for the iPhone and iPad users to have access to 158 new emoji along with various gender and skin tone variations that are unavailable in iOS. You only have to install this module from the magisk manager app and then reboot your phone, and you’ll find the emojis. In case you are unsatisfied with the emojis, you can revert to the original emojis by uninstalling the module. Using these modules are an amazing way to root your phone on your own and they can also improve your device’s work efficiency. These are safe to use and you can rely on them completely. These apps will be secured on your device even if you uninstall the Magisk application. If you are unsatisfied with any of the installed modules on your device, you can uninstall them at any point without any fuss. We would recommend you to use the Xposed module for Magisk as it enables you to have a wide range of tweaking options.
Source : Android Device
0 notes
Text
Cómo utilizar ViPER4Android FX para mejorar el sonido en su Android
Hay ciertos elementos básicos sobre la vida y la naturaleza que los humanos han estado tratando de perfeccionar durante siglos. La atracción que el oído humano tiene por los sonidos y la música, en general, ha llevado a la creación de instrumentos musicales, dispositivos de sonido y una industria musical de mil millones de dólares que no sólo es una fuente de inspiración y entretenimiento, sino también un medio de vida para muchos. Relacionado: Las mejores aplicaciones de papel tapiz para tu teléfono Android Cómo crear una pantalla de inicio mínima en tu Android Los teléfonos móviles han sido diseñados
La entrada Cómo utilizar ViPER4Android FX para mejorar el sonido en su Android se publicó primero en Android Libre Club: Todo Sobre el Sistema Operativo.
0 notes
Text
Step by step OS installation using ADB sideload
youtube
This video will show you step by step installation of Custom rom in android device using ADB sideload option in custom recovery TWRP. You can leave a comment below if you have some questions about the video. Please don’t forget to subscribe to my YouTube Channel to notify you if i have a new video upload, thank you very much for the time watching this video.. God bless.
Visit my FACEBOOK:
Don’t Click:
Minimal and ADB fastboot link:
Subscribe to my YouTube channel:
Other videos:
Portrait Image in Huawei:
Product Give Away (GearBest.com):
Resurrection Remix Oreo (Huawei Y6 II & P8 Lite):
AOSiP Custom ROM Huawei Y6 II & Huawei P8 Lite:
Firmware Build Number CAML21C636B250:
How to install CUSTOM KERNEL in Android Device (For Good Battery Life):
Cosmic OS Custom Rom [ Huawei Y6 II & P8 Lite]:
How To Extend Battery Life:
How to install XenonHD Custom Rom & Rom Review [Huawei Y6 II & P8 lite]:
Mokee OS Custom ROM [ Huawei Y6 II & Huawei P8 Lite ]
halogen OS Install and Review:
RR-OS Nougat Custom ROM:
How to UPDATE Firmware VERSION for ROOTED Smartphone:
Dot OS Custom Rom in Huawei Y6 II:
How to install Resurrection Remix Oreo:
Colt OS in Huawei Y6 II REVIEW:
How to install Colt OS Custom ROM in Huawei Y6 II:
Part 1: Flashing Stock Firmware in Huawei Y6 II with Custom ROM Nougat :
Part 2: Relock bootloader & Update firmware manually:
How to install LineageOS 14.1 Nougat in Huawei Y6 ii:
How to install Android Oreo 8.0 in Huawei Y6 II //Gzosp 8.0 Oreo:
Finally I got Custom ROM Nougat without any issues // Paranoid Nougat AOSPA:
How to root Huawei Y6 II AOSPA Paranoid Nougat Custom ROM:
Magisk Manager Module // Viper4Android FX: Nguồn:https://hdwallpaperslovely.com/ Xem Thêm Bài Viết Khác:https://hdwallpaperslovely.com/cong-nghe/
The post Step by step OS installation using ADB sideload appeared first on HD Wall Paper Slovely.
from HD Wall Paper Slovely https://ift.tt/2OlJbjb via IFTTT
0 notes
Text
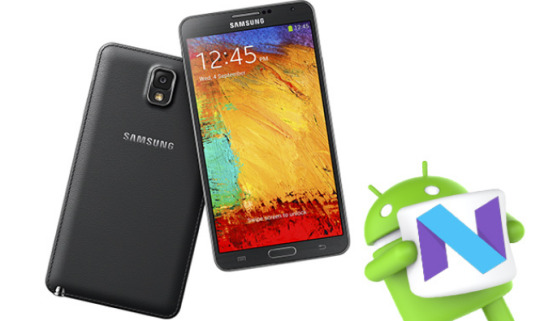
How To Download And Install Viper4android On Nougat 7.0 & 7.1

Android developers are officially launching many versions of Android devices with amazing features but when we consider the audio powers on these devices some people will say it is not enough! to enhance the audio power from every device there is the best tool called Viper4android apk. If you are also willing to enhance the power of audio from your handset? simply follow this simple guide.
Why Viper4android apk?
Viper4android is a world-famous best sound enhancer for every Android device users. The latest edition is a perfect match for all the devices and many experts have used this tool on their device to have amazing audio quality from their handset. This is a creation of XDA developers and rooted devices can install and customize any music with a simple control panel on it. The most commonly used Android audio modification tool is viper4android and this will perfectly be executed on any Android handset above Gingerbread version. Here I have includes a genuine download link along with simple execution methodology to install it on Nougat 7.0 & 7.1. Simply follow to install it on your beloved Android handset too.
Download
You can download Viper4android directly from an official host on your rooted Android smartphone or tablet.
Disclaimer: Viper4android FX apk does not warrant that the website is free of viruses or other harmful components.
youtube
Installation Step Guide
This will need only 2 minutes to install it on your handset. Simply follow all these simple execution methods and keep in remind that this is only for Android rooted handsets.
Step 1: Install Busybox from the official site on your target smartphone or tablet
Step 2: Then download the latest Viper4android apk from the above section
Step 3: Click on the icon to open the tool and start the installation process
Step 4: When you will get drivers to update then simply click on the "yes" button to start the methods
Step 5: Grant root permissions from your device to run the tool
Step 6: The driver loading will start it will take about 2-3 minutes.
Step 7: Later you will receive a “success” message on your smart screen. that’s all you setStep 8: Before using the enhancer simply reboot the handset.
Step 8: Before using the enhancer simply reboot the handset.
Final Verdict
Thanks to the XDA developers who have made many music lovers dream a true one. Try the latest edition on your handset to have amazing enhancing features on your beloved handset. Happy Music!
0 notes
Text
How to install Viper4Android Fx on Android device
How to install Viper4Android Fx on Android device
Viper4Android is a well known audio enhancement program which will take the audio quality on your Android smartphone to the next level. As you know, most phones come with Dolby Atmos audio, but not every phone comes with that. So, the ones that don’t come with that you guys take advantage of this and improve the music experience on your phone. The Viper4Android app/module works both ways that are…
View On WordPress
0 notes
Text
Guide to download Viper4android FX APK
Viper4android FX APK is a sound equalizer and also famous android mode among Android users. This amazing application let you change the function of the sound of your android phone. This article is supposed to give you a few tips on how to download viper4android FX APK to your device. Viper4android FX APK is somewhat standard than other similar applications. Those applications are not supported to some devices. However, the Viper4android FX APK is not specified for any device and work properly on any android phone. This application does not require the latest version of OS for the run. Viper4android Fx APK is a popular and also old sound mod available for the platform. This amazing application has been enabled the users to take full advantage of the inbuilt audio of their android device and help users in various occasions. If you are a music lover, this is the time for you to boost your Android device by modifying with viper4android FX APK. This article is about to guide you how to download viper4android FX APK. XDA developer is the developer of this application thanks to zhuhang.
Before Download Viper4android FX APK
Viper4android driver app is a free application and for rooted android devices.
Busybox must be installed on your device.
Custom Recoveries
Steps to follow to install Viper4android FX APK
Download Viper4android Fx on your rooted Android Device.
Install to your device.
Open the app and allow Update driver option by clicking on YES.
A message will be displayed asking for root permission.
Click on the grant to give permission.
It will start to download drivers.
When driver loading complete message will be displayed as successful.
Reboot your device.
Viper4android FX APK is a best sound app those who wants to listen highquality music. It needs custom recovery how ever you can install it without recovery option. But we are highly recommend you to install via costom recovery for optimize results.
How to install Busybox
Download busybox to your device. Then open busybox and click on install. Make sure to connect via internet. Wait few minutes and then it will ask for root permission.Allow root permission.When you download all the required binary files it will show as installation complete. Then head over to Download viper4android FX APK as mntioned above.
Final Word
So follow steps and tips above and download Viper4android FX APK to your smart device and then start to change ordinary way of music you listen. Hope this amazing application will uplift your music listening.
0 notes
Text
Easy Guide to Download Viper4android For Nougat 7.0
Viper4android for nougat is the successful software when it comes to sound adjusting tool for android nougat devices. It has made sound clear and quality over millions of androids. After few months of idle status, developer of v4A, Zhuhang has revealed viper4android official update 2.5.0.5. The aim of the update is to enable nougat users to enable install the software. Also, it has come with some new features. This app now has been a magic and everyone needs it. For the unknown,viper4android is the king of sound modification tools which are available for androids. When you have this installed you do not need to spend extra cost on expensive hardware to make the sound quality. You are advised to root your device properly with a trusted rooting application and have the busy box installed to get viper4android for nougat. If you wish to have viper4android for nougat Get from viper4android.com

Trail of Viper4android for nougat 7.0
Initially, new app icon, package name, and UI were released and Next added cross-channel convolver support which allows a reliable remake of the sound field effects requiring such cross-channel convolution like stimulating speaker sound field on headphones otherwise crosstalk cancellation on a stereo speakers. also added an EFT compressor (New compressor). As well as version supports for custom setting storage path which means now you do not need to look everywhere for the setting directory.finally all bugs issues have been fixed. After this long journey now you can have the latest version of viper4android for nougat.
Benefits of Viper4android
You can have the Ability to toggle the master power into four main categories, Headset, Phone speakers, Bluetooth and USB/DOCK. Also, all category can be on or off with a single key. You have playback gain control option in this app to control signal according to app instruction. So variations of the input signal may not occur. Also enable viper-DCC is another great feature that has been added to the audio processing App to present a neutral audio response from regular devices such as headphones. As well as Spectrum extension works with higher frequencies without damaging any audio filter and make audio quality than other audio modification apps. The FIREqulizer let users change the settings to please ears as they wish. Also, field surrounds, differential surround, and headphone surround functions give a natural sound and viper clarity and viper bass offer you strong and quality output audio. There is Auditory system protection option that allows you to control all the frequencies according to your demand.Viper4android for nougat offers all the benefits above mentioned.
Step Guide to Install Viper4android for Nougat 7.0
Root your device and install TWRP recovery
Download the Viper4android_2.5.0.5_guitardedhero.zip file and transfer it into internal storage of your device
Boot into TWRP recovery and install/flash iper4android_2.5.0.5_guitardedhero.zip file your device
Now reboot the device
Download a root file explorer app and go to Vendor/etc / directory and rename audio_effects.conf to audio_effects.conf.bak
Now open Viper4android FX
Then you will get a message indicating install V4A drivers. Give it to YES
After the process is completed you will get a message indicating Driver installed
Finally, reboot the device and enjoy viper4android for nougat
Windup
So if you are an owner of an android nougat you can download viper4android for nougat and listen to the high-quality music without extra cost. Try today itself and make boom boom sound wherever you go.
0 notes
Text
10 essential Magisk Modules for Android Devices
New Post has been published on https://trendyport.com/10-essential-magisk-modules-for-android-devices/
10 essential Magisk Modules for Android Devices
#Android#App Systemizer#ARcore#ARCore/ Playground Patcher#Bixby Button Remapper#Call Recorder#CloudflareDNS4Magisk#install Magisk Modules#ios12.1 Emoji#magisk#Pix3life#Uninstall Magisk Modules#Viper4Android FX#Xposed Framework
0 notes
Text
10 essential Magisk Modules for Android Devices
New Post has been published on https://trendyport.com/10-essential-magisk-modules-for-android-devices/
10 essential Magisk Modules for Android Devices
#Android#App Systemizer#ARcore#ARCore/ Playground Patcher#Bixby Button Remapper#Call Recorder#CloudflareDNS4Magisk#install Magisk Modules#ios12.1 Emoji#magisk#Pix3life#Uninstall Magisk Modules#Viper4Android FX#Xposed Framework
0 notes
Text
Magisk Modules That You Must-Have on Your Android Device
Magisk is an open-source road utility system that provides security updates on your phone. It is a great option to help you customize your ROMs and OS updates, remove Bloatware, and take over the complete control on your mobile device.
You can begin by rooting with Magisk. It works best with devices that run on Android 5.0 and above. You will require a custom recovery and the Magisk Manager app from XDA developers to begin rooting. Install the Magisk Manager App on your device and open the navigation drawer on the screen. Click on ‘Install’ and press the ‘Download’ button. Reboot your phones to flash your device through TWRP. You can easily install the Magisk module in either of the two ways:
Method One
So this method you will require Magisk-Modules-Repo or Magisk by XDA developers.
Begin by downloading the module on your phone storage.
On the Magisk Manager app, select Modules from the sidebar.
Tap on the Plus icon and find your downloaded module.
To open your desired module, give a long press on it, and the installation process will begin.
Reboot your phone when the app instructs you to do so.
Method Two
Go to ‘Downloads’ of the Magisk Manager app.
A list of available Magisk modules will be shown on screen. You can download by tapping on either of them to read more information about them, including the instructions on how to install and use it.
Click on the download icon to install a module. If you click on the ‘Install’ button, it will download and install everything in one step, but clicking on the ‘Download’ button will save the module directly on your phone storage.
Click on the ‘Install’ button and click on ‘Reboot,’ when prompted, to place the module properly on your device.
If you can’t see anything on the Download list, you can go to your Settings and select Clear Repo Cache and retry the whole process.
In case you are dealing with problematic modules, you can uninstall them at any point by simply going to the Modules in the Magisk Manager app. Remove that checkmarks from the box given on the side of a module to disable it and hit the reboot button. Click on the Trash Can icon and press on the reboot button again, to remove the module entirely from your device.
Following are some of the Magisk module that you must have on your device for better performance:
Xposed Framework
Applying add-ons or mods to the ROMs has become much easier with this module. It adds individual features to the ROMs you use on your device. Because it’s systemless and open-source, it is most likely not to block the Android’s Operating System updates.
App Systemizer
It allows you to convert different apps into system apps so that they don’t get uninstalled by adding an extra protective layer to secure those apps. App systemizer won’t modify your device’s system partition, and it automatically updates itself through the Play Store. Moreover, you can retain the apps you converted from App Systemizer, even after uninstalling the Magisk app.
ART optimization
This virtual machine was introduced by Android lollipop, and it brought the compilation of ahead-of-time (AOT) to the Android code. It configures the art optimization activation on the device, and you can change it on-the-fly based on the profile you have chosen.
Dolby Atmos
As the name suggests, this module will provide effective sound improvements on the device and various other options to enhance the audio quality of your mobile.
Viper4Android FX
It is the most advanced music modification module available on Magisk. It provides extended audio functions for your device that can be customized and modified by you for any part of your Android device’s audio system. You will achieve full control over the audio outputs, volume levels, clarification, and more.
Call Recorder
Some Android devices don’t support call recording features. If you are someone who requires this feature for their everyday business calls, you can use this module. Your only task will be to install this module, the call recorder will handle the rest of the tasks after you activate it. You can also include or exclude specific numbers for recording.
Cloudflare DNS4 Magisk
It has cutting edge technology that is safe to use, and it will provide you with the best privacy benefits to control all your internet surfing traffic. It neither tracks nor stores your data. It provides you with a DNS privacy protection mechanism and combats snooping. It encrypts all the communications between the stub resolver and the recursive resolver.
YouTube Vanced
This is great for your YouTube app to help you support background play, pinch-to-zoom gesture, play videos on loop, blocks ad, and many more. On Oreo devices that also support Picture in Picture (PiP) mode. You can use the override maximum resolution feature as well.
iOS 12.1 Emoji
It is the best option for the iPhone and iPad users to have access to 158 new emoji along with various gender and skin tone variations that are unavailable in iOS. You only have to install this module from the magisk manager app and then reboot your phone, and you’ll find the emojis. In case you are unsatisfied with the emojis, you can revert to the original emojis by uninstalling the module. Using these modules are an amazing way to root your phone on your own and they can also improve your device’s work efficiency. These are safe to use and you can rely on them completely. These apps will be secured on your device even if you uninstall the Magisk application. If you are unsatisfied with any of the installed modules on your device, you can uninstall them at any point without any fuss. We would recommend you to use the Xposed module for Magisk as it enables you to have a wide range of tweaking options.
Source : Android Device
0 notes
Text
ViPER4Android FX v2.6.0.2 with Xda
ViPER4Android FX v2.6.0.2 with Xda
Apr 9th, 2018, 1:03 pm #5404503 by keril7771 ViPER4Android FX v2.6.0.2 with XdaRequirements: 4.0+ | ROOTOverview: ViPER’s Audio is an audio enhancing software to provide everyone with better audio experiences in various platforms such as smartphones and PCs.Viper for android Fx or Viper4Android is basically a audio equalizer app which is too powerful and greatly awesome.Viper for android or…
View On WordPress
0 notes
Text
Things to remember when you install ViPER4Android
Ensure your phone has no less than 80 – 85% charge. If not, kindly do charge it before beginning the trial.
Ensure your gadget has TWRP Custom Recovery introduced from previously. Something else, this instructional exercise won't work!
Your gadget must be established! If not, discover your establishing guide here!
You have to play out a Dalvik Cache wipe in recuperation mode before introducing the ROM.
Reinforcement your Android Device
We don't need you to lose any information, or anything could turn out badly out of the blue. Before beginning the instructional exercise, we unequivocally prescribe you to make a full reinforcement of your phone. In the event that conceivable, take a full Nandroid Backup by means of TWRP, or you can experiment with a portion of the Hand-Picked Android Backup Apps to secure your information rapidly.
Instructions to Install ViPER4Android on Android 8.1 Oreo
We have specified full well-ordered guidelines on How to Install ViPER4Android on Android 8.0/8.1 Oreo. On the off chance that you are altogether new to Custom Mod, please read the whole instructional exercise once before really performing it on your gadget.
The instructional exercise has been isolated into 2 section:
Pre-setup: setting up the gadget with Gravity Box.
Mod Setup: ViPER4Android Installation
Pre-setup: Tutorial (Step-by-step)
Stage 1: Download and Install BusyBox and Install it on your established Android Device:
BusyBox
Download
QR-Code
BusyBox
Designer: Stephen (Stericson)
Value: Free
Open the App and give root consent.
BusyBox
Introduce BusyBox
Ensure you introduce BusyBox appropriately. Try not to alter any alternative. Abandon them as they seem to be!
You will see a winning message when the establishment is finished (Check Screenshots above).
Stage 2: Download and Install Solid Explorer record chief on your gadget:
Strong Explorer File Manager
Download
QR-Code
Strong Explorer File Manager
Engineer: NeatBytes
Value: Free+
Stage 3: Swipe out from the left corner of the App screen and "tap" on Root choice under the capacity area.
The App will request Root authorization. Simply give them!
Stage 4: Now, explore to/Vendor/and so on and discover the record "audio_effects.conf" inside it.
Strong Explorer
Stage 5: Rename the document to "audio_effects.conf.bak".
How?
Long push on the document and "tap" on the 3-speck flood on the highest point of the correct side and select Rename.
Tap "alright" and leave the Solid Explorer application!
Stage 6: Set the SELinux status as Permissive. To do that, Download the SELinux Switch App from underneath and introduce it on your gadget.
Download The SELinux Switch App
Presently, Open the App and allow the Root consent. At that point, press "Tolerant" Button to set the SELinux status as required.
The SELinux Switch App
Stage 7: Reboot your gadget in the wake of playing out the Step 6.
That is it! Your gadget is currently set to Install ViPER4Android Oreo. Keep perusing beneath to conclude the Mod.
Mod Setup: Install ViPER4Android Oreo
Stage 1: Download ViPER4Android Oreo Zip Package from the connection underneath and remove it on your PC:
Download ViPER4Android FX 2.5.0.5
You will get the accompanying 2 documents:
ViPER4Android_FX_v2505_A4.x-A7.x.apk
ViPER4Android_FX_v2505_A7.x_Nougat_IO_test_fix.apk
We just need the second one �� (ViPER4Android_FX_v2505_A7.x_Nougat_IO_test_fix.apk)
Stage 2: Connect your gadget to your PC utilizing USB Cable and exchange the second document to phone inside capacity. Ensure your PC has Android USB Driver introduced. Something else, your gadget won't perceived by the framework.
Stage 3: Now, introduce the APK document from your phone inside capacity and open it.
Stage 4: Once you open the App (ViPER4Android), it will request refreshing the V4A driver. Affirm by tapping on "Yes" and concede root authorization to it.
The driver establishment should begin, and it will take 30-60 seconds to finish. Your phone screen may get a stop. Try not to stress over that.
Once the driver establishment is finished, tap on "alright" and reboot your gadget.
Stage 5: Once the gadget is ON, open ViPER4Android again and swipe out from the left to open the menu.
Stage 6: Confirm the driver status — Tap on "Driver Status", and it should demonstrate the status esteem as typical.
ViPER4Android
Yahoo! You are finished with setting ViPER4Android Oreo on your gadget.
You would now be able to appreciate the mitigating and improved sound involvement on your gadget running Android 8.0/8.1 Oreo. Presently you can Modify the sound setting of your phone in the way you like.
In the event that you experience any issue, please remark underneath, and we will hit you up as quickly as time permits.
Kindly bear in mind to share on the off chance that you have discovered this post accommodating!
0 notes